
Entrance to the church, by architect John D. Holmes 1994.
My Eucharist window for Blessed Robert Grissold Church has just been installed and blessed by the bishop in a service that commemorated 25 years of the church. The comments have been overwhelmingly positive and I feel fortunate that this modern brick church wanted a painted window and that they found me to design and make it. The focus of the window is the chalice, so I was particularly pleased that you can see it from outside (even through the textured glass that was left in place) and that it shows up so well from a distance. The parish priest was particularly pleased with the pure white of the chalice as it reminded him of the white body of baby Christ in renaissance paintings, with realistic droplets of blood on the tablecloth underneath.
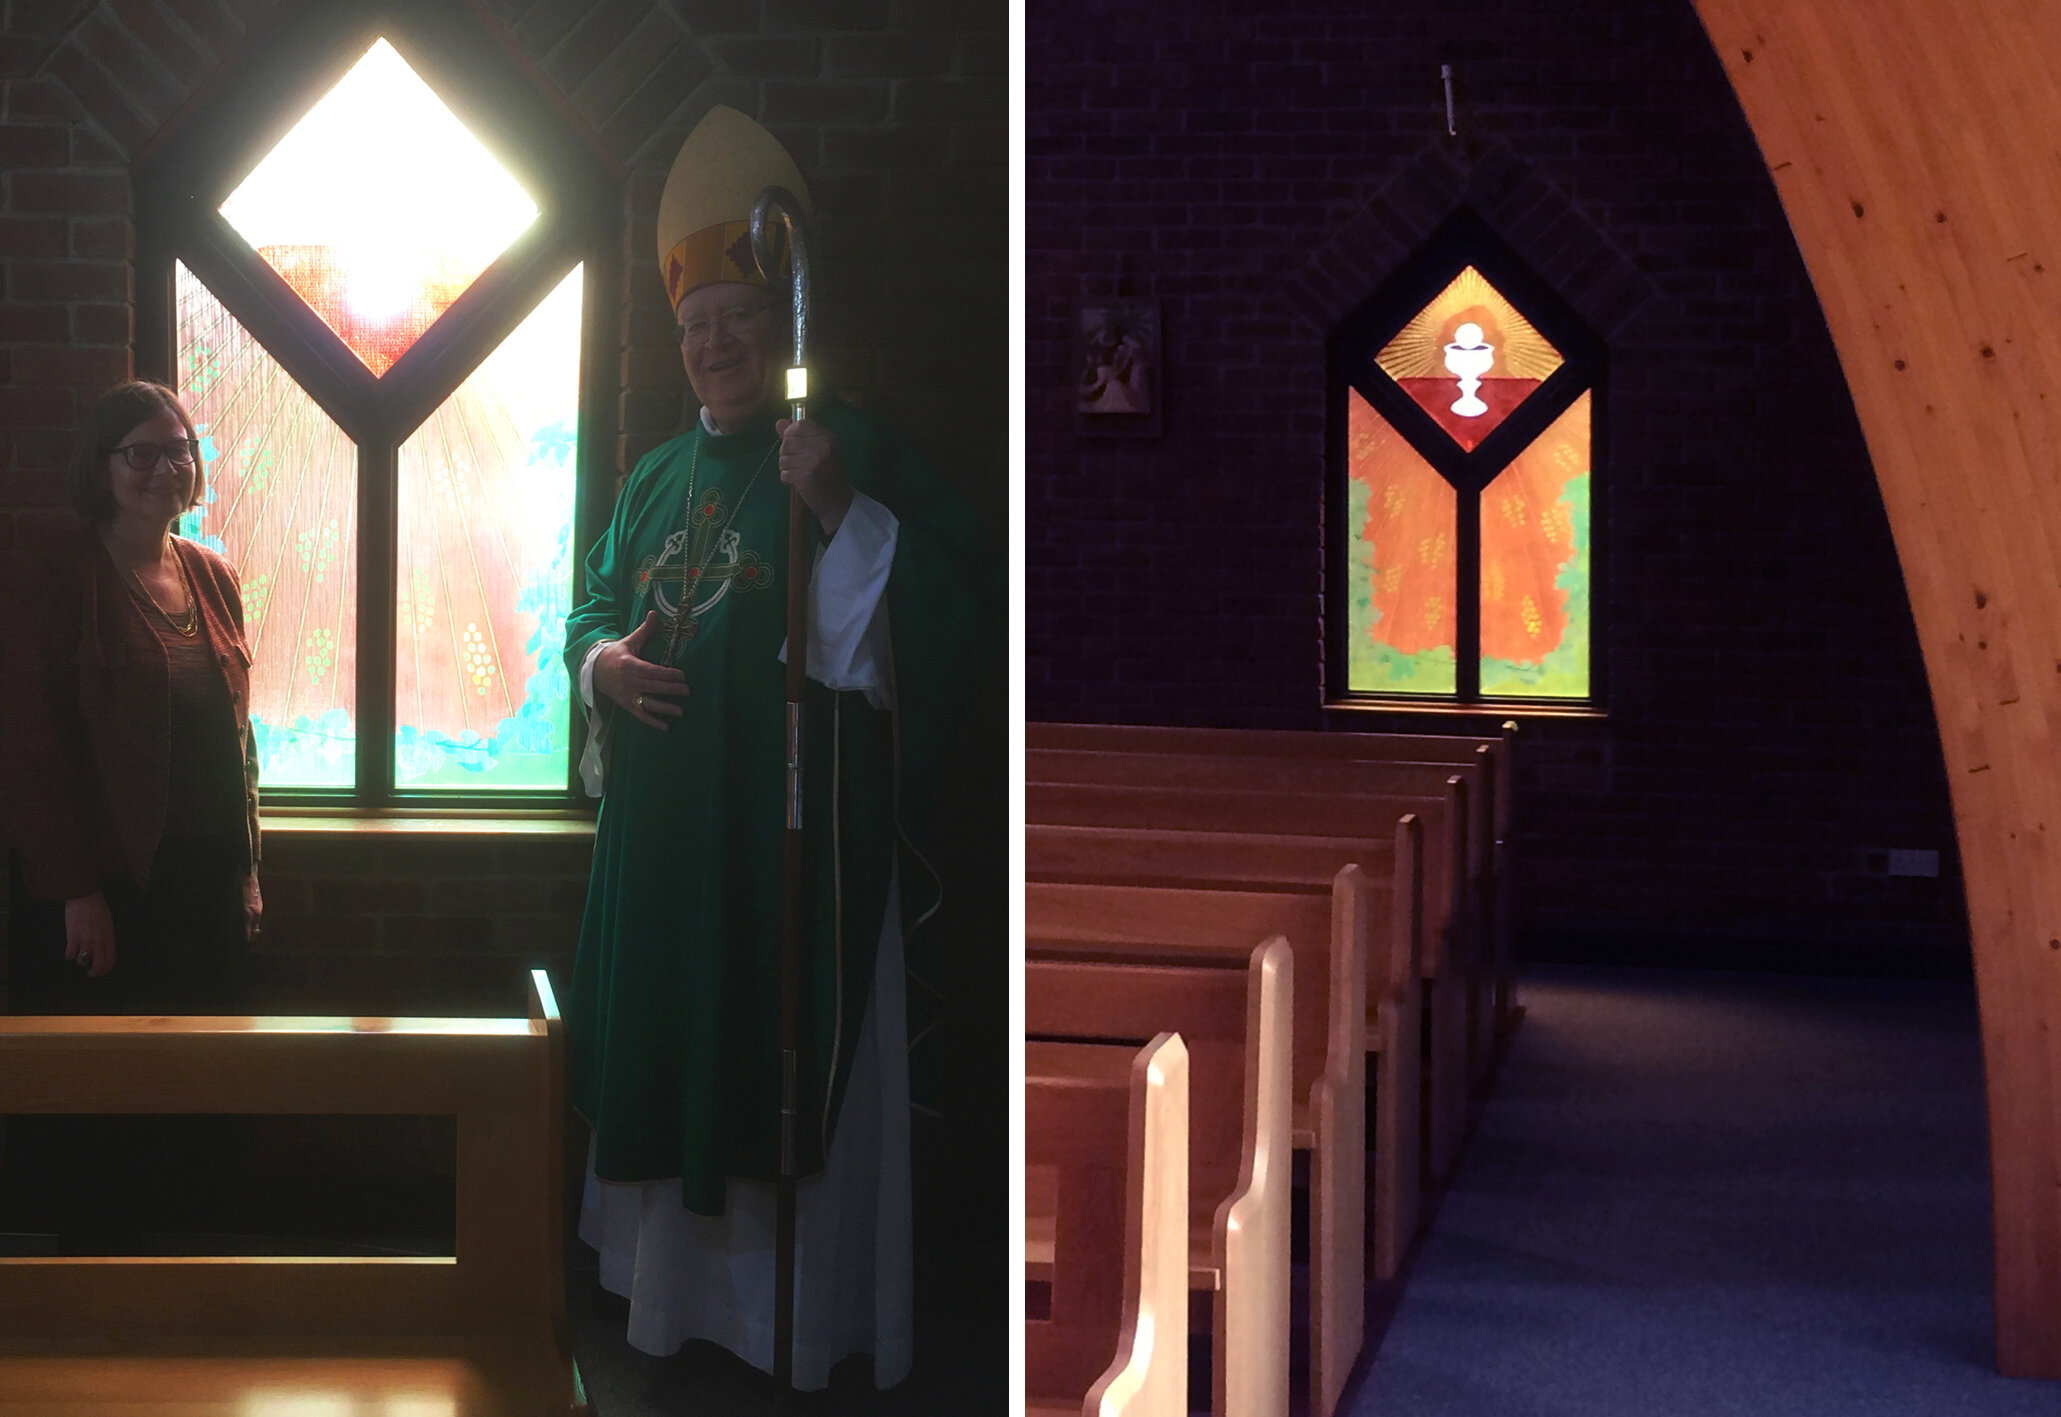
Left, with Bishop William Kenney. Right, the window from a distance.
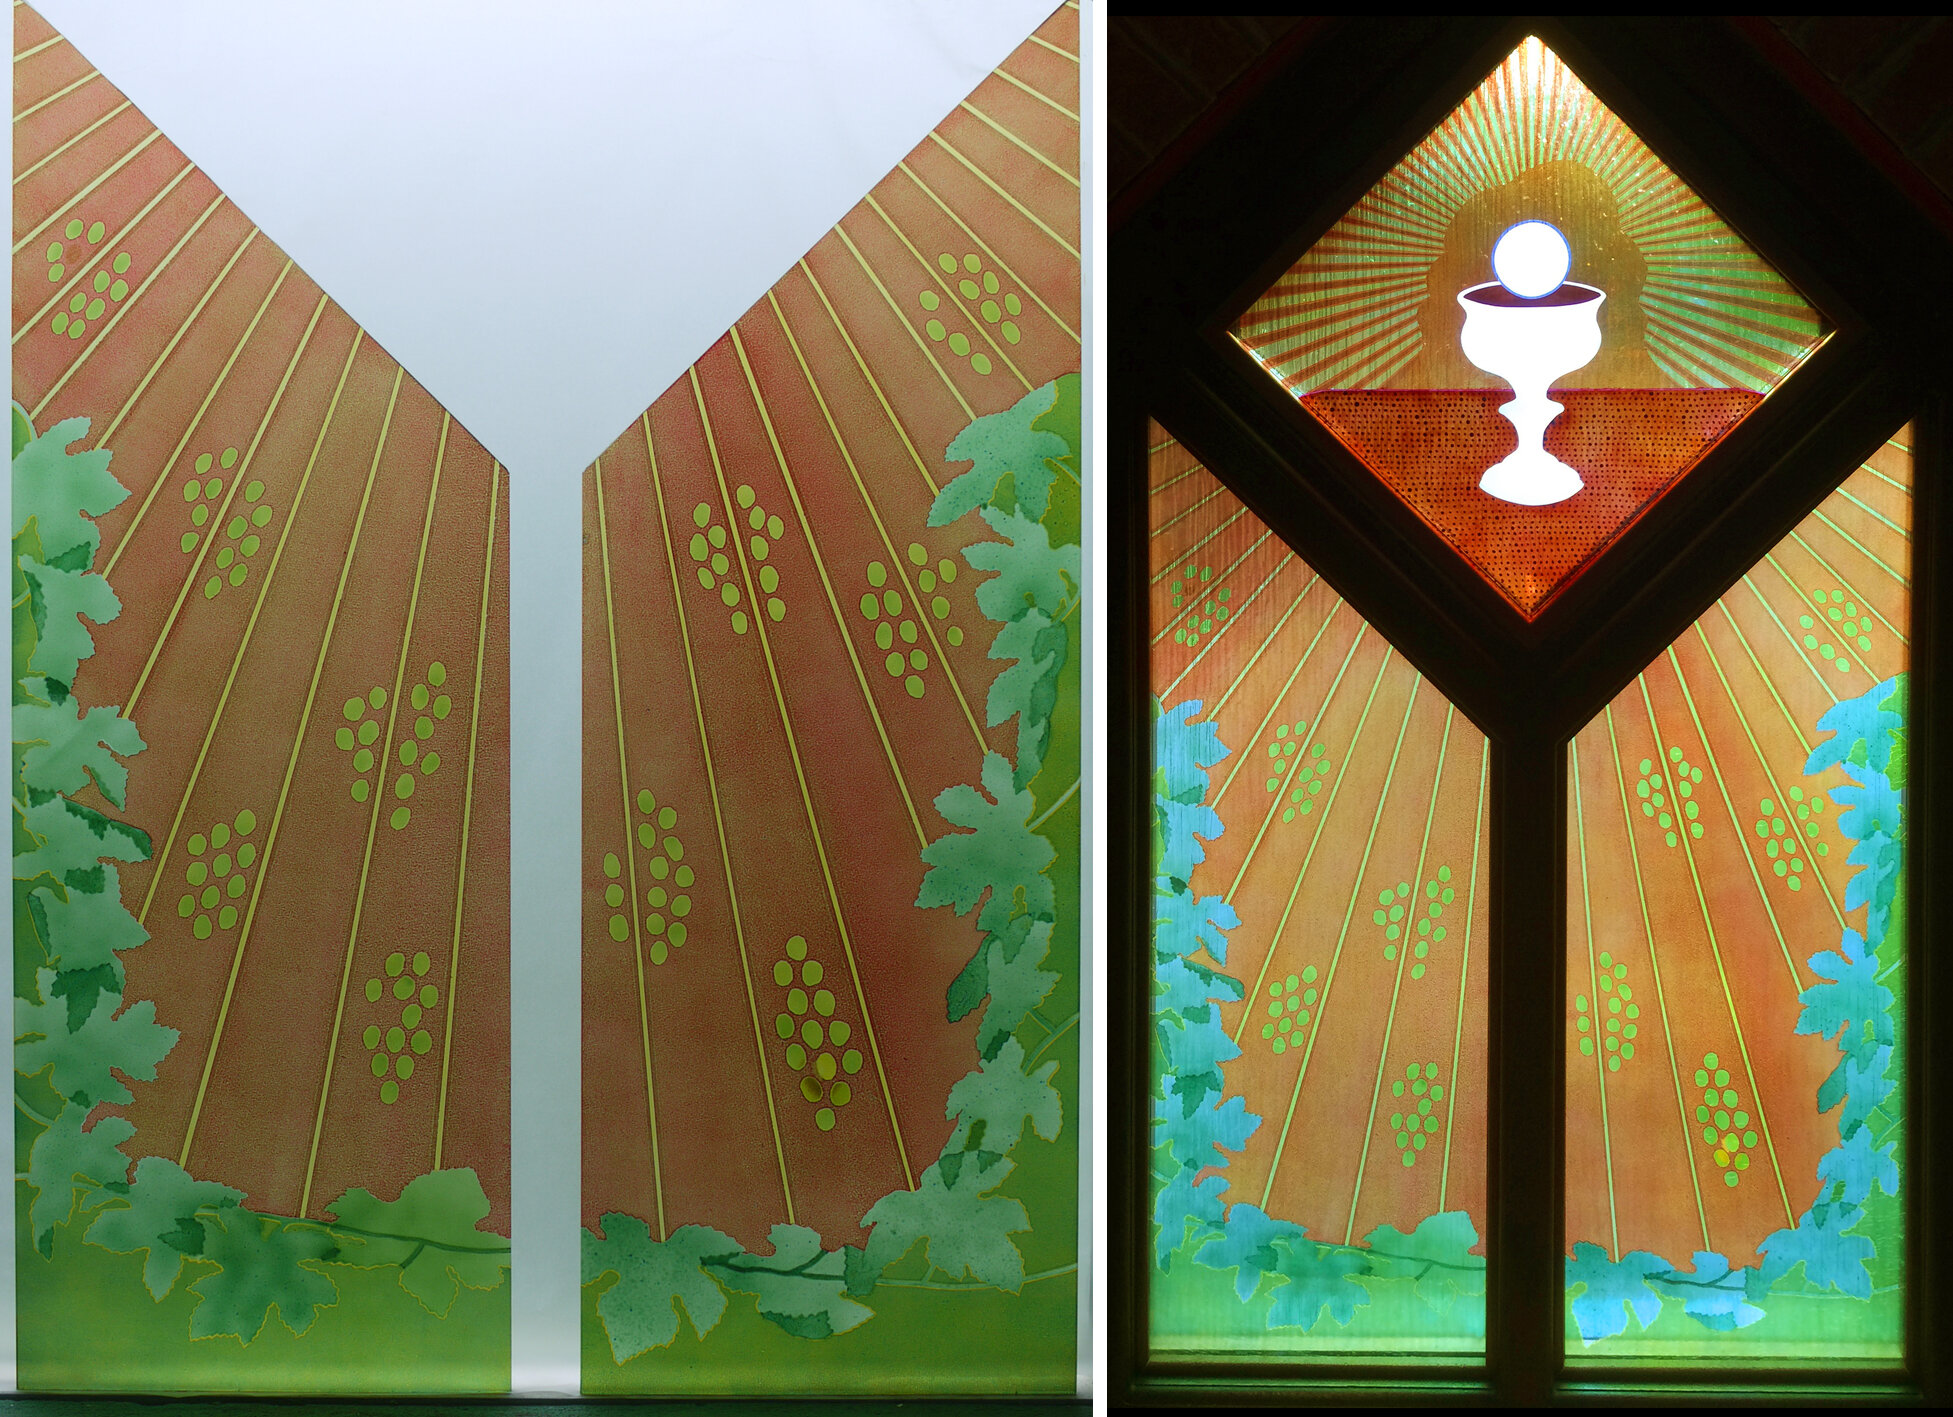
I photographed the panels during the making stages to show how I add layers of coloured enamel, and how it changes when fired. Between the painting stages are sandblasting stages, this adds opaque texture to certain parts, and also removes unwanted fired enamel. I work out all the stages before I start work, but then unexpected things happen. Although I know what colour the enamel will be after firing, I don’t always know, despite sampling, how the colours will look together. I also make mistakes (e.g. firing on bits of the adhesive vinyl stencil or missing out a grape) which may mean a whole new stage gets added on.

Left, stage one, lower right panel. Right, stage two, fired panels cooling in the kiln.
Stage one (above left) shows unfired yellow enamel. The glass has been sandblasted through a hand cut vinyl stencil, some of the stencil is removed before painting, in this picture that’s the grapes, and I’m half way through removing the rest of the stencil. I handpainted some leaf and stem details in green before firing. As you can see, this pale yellow layer covers most of the glass, giving the window that bright underlying glow.

Left, stage three, lower left panel. Right, stage four, lower right panel.
In stage three I added the orange layer over another vinyl stencil, you can see this clearly when the grapes and central stripes are removed (stage four above right). I added a layer of green around the border before firing - the photo of the panels in my studio window (below left) shows them after firing. It’s the same orange in the next photo (stage six below right) but shown on the lightbox where I do my stencil cutting and painting. Here the dark grapes and leaves have been sprayed with green enamel, still unfired. I thought this would be the last stage, but the greens were too similar, so I added another layer of yellow to the border and some of the grapes I’d missed out before the panels went back in the kiln for the last time (stage seven).

Left, stage five, lower panels. Right, stage six, lower left panel.

Left, stage seven in kiln. Right, stage seven, lower right panel.

Left, stage four, top panel. Right stage five, top panel.
The top panel also ended up with three firings instead of the two I’d planned. In stage four (above left) you can see the unfired orange over the fired yellow and the tiny drops of dotted blood. In stage five I painted a layer of ruby enamel over the tablecloth and in the chalice - the stencil is still on in this photo. The completed panel, shown below, had an extra pink line added between the orange and ruby, and a final sandblast to keep the chalice pure and white. Three dimensional details were added with deeper sandblasted layers, while the ring of clear glass that I kept around the host is what stands out the most.

Top panel finished, left, on the lightbox and right, installed.
The photo of the finished panels in my studio window makes a good contrast with the one of them installed in the church. Everything looks greenish here as there is a lush garden outside, but it is also true to say that the enamel colours change in different lights and distances and that there is no one accurate colour version of the window.
Left, completed lower panels in studio window. Right, complete window installed.